Healthy Homemade Fruit Snacks — Strawberry Flavored
You’ve surely seen my Healthy Homemade Gummy Bears right?? Well, I keep getting asked, “What’s the difference between your gummy bears and fruit snacks?” The gummy bears are super chewy and “gummy” while the fruit snacks are softer and your teeth sink straight through (kind of like pate de fruit)! Both are amazingly delicious, but I had to make both because I love gummy bears but my sister loves fruit snacks. I made these Healthy Fruit Snacks for my big sis because we’re going to the movie theatre soon and need to sneak in some healthy treats (we ain’t paying $9 for a big tub of trans fat-filled popcorn, naw thanks).
Those prepackaged “Fruit Snacks” from the grocery store and vending machines get on my nerves… with their shiny blue packages claiming they’re “Made With REAL Fruit” and “FAT FREE” (when in reality it’s really just straight up corn syrup, sugar, and artificial food coloring). This healthy homemade version is actually made with real fruit, and no corn syrup, sugar, or synthetic food dyes in sight!
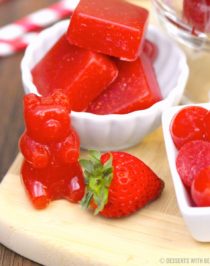
These Healthy Fruit Snacks are sweet, soft, chewy and packed with fresh strawberry flavor.
But wanna know what makes this recipe really great? It requires only 5 ingredients!! This recipe took quite a bit of tweaking to get juuuust right. I think I made a trial batch every weekend for a little more than a month (the checkout employees at Costco must’ve been wondering why I was buying so many darn strawberries on a weekly basis…)
In my 1st trial (and probably the worst trial of them all), the fruit snacks were a complete disaster. I could taste the gelatin (EW… like, BIG ew) and there was gelatinized foam on the surface of the gummies. Not very appetizing. Oh, and I didn’t strain the mixture so there were eighty billion strawberry seeds in every gummy. I hate seeds with a passion. I’d like to have a treat without having to whip out some floss! Plus, storebought fruit gummies are totally seedless (mostly because they are basically 100% corn syrup)
In my 2nd trial, the texture was more like Pate de Fruit. I love Pate de Fruit so this wasn’t a huge issue with me, but I was aiming for that slightly gummy fruit snack texture! Also, I didn’t strain the mixture well so some seeds ended up in the gummies, but definitely not as much as the first trial.
In my 3rd trial, I used a little too much lemon juice so they were really tart. Delicious (and SEEDLESS thanks to my new nut milk bag!) but not authentic-tasting.
In my 4th trial, I got the perfect amount of strawberry flavor and a really good texture… like in between Pate de Fruit and Gummy Bears. These Healthy Fruit Snacks are YUM!

These Healthy Fruit Snacks are totally drool-worthy. BIG taste, mini package.
Healthy Homemade Strawberry Fruit Snacks
Ingredients
- 1¾ cups Fresh Strawberry Puree
- ¾ cup Lemon Juice (freshly squeezed)
- ¾ tsp Liquid Stevia Extract
- 15 drops Natural Red Food Coloring
- 40g (¼ cup) Unflavored Gelatin
Instructions
- Wash your strawberries, slice the greens off and puree in a blender. Measure 1¾ cups of the puree and place in a medium-sized bowl.
- Stir in the lemon juice, stevia extract, and natural food coloring.
- Hold open a nut milk bag over a large bowl while you pour the strawberry mixture into the bag. Squeeze the bag to get as much liquid out as you can. You should get 2¼ cups of the mixture after straining.
- Pour the strained mixture into a nonstick saucepan, sprinkle the gelatin overtop, and let sit for 5 minutes. Stir it together and smush any big clumps of gelatin, don't worry about the small ones, they'll dissolve).
- Place the pan over medium-high heat and stir occasionally, until it comes to a light boil. Stir constantly when the mixture boils harder. When you can't stir the bubbles away, keep it on the heat for 30 seconds and then remove from the heat.
- Let the mixture sit for a few minutes so the foam/bubbles have a chance to dissolve. Carefully scoop the mixture into your silicone molds of choice (I used a variety of gummy bear molds, Hershey "Kiss" molds, and square molds). Let cool slightly on the counter, then transfer the molds into the fridge. Refrigerate until firm. To store, keep the gummies in a tightly sealed container in the fridge.
I really want to make these fruit snacks with other flavors soon (like raspberry, blueberry, grape, orange, maybe even lemon or lime) but I think I’ll stick with what I know is good for now 😉
.
With love and good eats,
.
– Jess
.
Indulge − no strings attached!


Jessica, these are amazing. We were literally just talking about trying to make these for our boys. So much tastier and we would actually KNOW what’s in them. Thanks and have a great weekend!
Thanks so much Matt!! 😀
Beautiful- want to make these, but don’t have a milk-nut bag. I can’t abide the seeds either!
You do lovely work, Miss Busy-As- A- Bee!
Thanks so much! 😀
If you have a fine mesh coffee filter (thoroughly cleaned… coffee-flavored fruit snacks doesn’t sound very appealing haha) you can try using that too. Or a cheese cloth. I used a coffee filter a few times but it just took a long time to strain the mixture. I had to stir it and pack it down for about 30 minutes.
I might be super busy, but I’m happy to be busy doing stuff I love because I get to share the results with you 🙂
-Jess
Yummmmmm! Do you think I could use a fine mesh strainer or a sieve instead of the nut milk bag? Cause I really want to make these and I don’t think I could wait for my bag to be shipped…. 😛
Oh yeah, can I use bottled lemon juice instead of fresh? Costco sells these huge bottles of organic lemon juice and I would rather use that than have to buy a ton of lemons. Thanks!
Oops I just saw your note about the strainer! I’ve sure commented a lot… Sorry! :-/
Don’t feel bad! I’m sure someone out there had the same exact questions! I’ve tried using a fine mesh coffee filter (thoroughly cleaned, of course) but it took about 30 minutes to stir it and pack it all down. With a nut milk bag you get to squeeze as much juice out as possible 🙂
I haven’t tried using bottled lemon juice but I’m sure it will work just as well! The fruit snacks might be slightly more tart, but I don’t think they’ll be too toooo tart. I’m glad Costco sells organic lemon juice… I definitely have to find that on my next trip (aka, TOMORROW) 😉
-Jess
Hi! These look fantastic! I’m excited to make them for my four year old. Just one question..how many strawberries did you use? Thank you in advance 🙂
Thanks so much! I used a large container of organic strawberries from Costco (I think it was 2 pounds?). I had a few strawberries and quite a bit of puree left over, but I just drank the puree as a snack. You could also use the excess strawberries in a smoothie 🙂
I hope your kid likes the fruit snacks! 😀
-Jess
not sure this site is still current but i’m making these tonight and am SO excited! skipping the food coloring too because i’m cheap lol but i’m pregnant and constantly hungry and need some low sugar snacks – the reduced sugar fruit snacks at the store just won’t cut it. can’t wait to see how they turn out!
I have always wanted to try making these…thanks for an easy and natural recipe…hopefully mine look as good as yours. Cheers.
Thanks so much!! Make sure not to fill the gummy bear mold cavities too much otherwise the snacks will “overflow” and not have a flat back (made this mistake myself!)
Also, it helps to put the molds onto a flat cookie sheet before you fill them so when you put them in the fridge you don’t have to walk over slowly and carefully (like I did, so worried that I’d spill them haha)
Hope you like the recipe!
-Jess
I just made these with mango (since I have a tons of mangoes right now) and they turned out great! A few notes: I strained the mango even though there wasn’t the worry of seeds but it kept the pulp out which I think was good. I didn’t have any stevia left so I used agave and when I tasted it it seemed sweet enough but the finished product could definitely have been sweeter. I only had 30 g of gelatin which seemed to work fine and they weren’t like fruit pate. I poured my mixture into an 8×8 brownie pan and just cut them into little squares. I would say it made about 36 and then I just stored them in a container in the fridge for snacks! I think I want to try some combinations like strawberry kiwi or orange carrot. Or even a green juice mixture! Thanks for the recipe!
Using mango instead of strawberry was a GENIUS idea. I think I’ll do what you did next time I make this and use an 8 inch brownie pan instead of the molds. I think I’ll like the small cubes better than the big bears 😉
Mmmm orange-carrot sounds awesome! And the green juice sounds great so we can sneak in some veggies!!
-Jess
Did you end up writing about your variations on your blog? I am horrible at creating things like this, but I’m great at following other’s instructions. I would love to know what you came up with.
Yup! I made a few other yummy versions:
1. Blueberry Fruit Snacks
2. Green Apple Popeye Gummy Bears
3. Orange Gummy Bears
Hope this helps Kaitlyn, and I sure hope you like the recipes! 😀
-Jess
Thank you for this recipe! I just made some with acerolas from our yard. Awesome! I used a strainer w success, my blender did a fine job, the bottled lemon juice and regular sugar, just because I didn’t want to wait, I skipped the food coloring and still love the color. They were a success!can’t wait to try other ingredients
WOW, homegrown acerolas? Great idea! I’m glad a regular strainer and bottled lemon juice worked out for you 🙂
Now I’m thinking of so many other flavor possibilities for this recipe! Thanks!
-Jess
I want to try bananas! Also forgot to mention I used an ice tray for a mold
These make me so happy. I cannot even describe how much I wanna try and make them. Thank you for your efforts in refining the recipe!
YAY I’m so glad the recipe brings a smile to your face 😀
Totally worth the multiple failed batches, haha
-Jess
Okay, okay, so I’ve made it.
I’m so freaking happy – everything went *perfectly*. We let it set overnight in the fridge and in the morning my fiance and I excitedly starting taking them out of the moulds.
I will deny eating half of them as we were going through this process *hides*
BUT if we DID … we felt guilt free because they are sho healthy.
I omitted the stevia because I’m in a “sour” craving phase at the moment and it was ideal… mmm…
I posted a photo on your Facebook page but decided to post here for your readers too – to see its possible and SUPER easy!
– https://scontent-a-vie.xx.fbcdn.net/hphotos-xfp1/t1.0-9/10255008_10152418393636041_8282918072108943560_n.jpg
– https://fbcdn-sphotos-c-a.akamaihd.net/hphotos-ak-xfa1/t1.0-9/10308315_10152418379251041_4341102438182799716_n.jpg
YAY I’m so glad you made the fruit snacks and it turned out well!! I definitely want to try a sour lemon or lime flavor sometime soon, a lot of people LOVE those flavors!
You’re so funny Jovana haha 😀
Thank you so much for taking the time to make the recipe 🙂
-Jess
Pingback: Desserts With Benefits
Awesome recipe! Definitely going to try it! If we don’t have Stevia extract is there anything we could substitute it with? If not would it change the flavor of the gummys too much if Stevia wasn’t used?
I’m afraid stevia extract is pretty difficult to substitute. It’s a really strong natural sweetener, so 3/4 tsp of stevia has the same amount of sweetness as 3/4 cup of sugar (or in typical fruit snack ingredients, corn syrup)
I would recommend substituting the stevia with 1/2 cup organic agave nectar (if you’re serving these fruit snacks to kids or people used to really sugary treats, I would recommend using 2/3 cup agave). Add the agave in step #4 into the saucepan. No need to strain it!
I hope this ingredient replacement works out alright! I hope you like the recipe 🙂
-Jess
this looks great! I have two questions about this; 1) how long do you think these will store? 2) do you have any ideas on how to add vitamins to it like the vitamin chews they sell at the store?
Thanks so much Roxy!
1) These lasted me three days, but I’m sure they will last about a week or two if they’re stored in an airtight container in the fridge 🙂
2) I wouldn’t recommend adding vitamins to these because they will add a gritty texture and a bad taste. Major food companies have special blends so that they don’t impart a taste.
I hope you like the recipe!!
-Jess
Pingback: 5-ingredient Healthy Homemade Fruit Snacks! Like Welch’s but… | Dieting 'n' Fitness
Pingback: 5-ingredient Healthy Homemade Fruit Snacks! Like Welch’s but… | Fast Weight Loss
My mom used to boil new panty hose, then use them as a strainer when making jelly. You could just use knee highs, stretch them over a jar, with the hose inside, pour the mixture in, then strain. Getting the cheep brand means you can toss when done.
Pingback: Healthy Snacks Homemade Recipe | kscfood
oooooooooooooooooooooo!!!!!!!!!!!!!!!!
yummy!!!!!!!!!!!!!!!!!!!!!!!!!!!!!!!!!
Pingback: The Ultimate Guide for Healthier Holidays | Kitchology Food Allergy Blog
YUM! I just made these. I also made raspberry ones. Two packages of Driscoll’s raspberries, 1/2 cup lemon juice, 3 full droppers of liquid stevia (probably about 2/3 tsp) and 4 packs of Gelatin (not sure the cup equivalent – but definitely less than 1/4)
Mmmmm raspberry fruit snacks sound AMAZZZINNGGG 😀
I’m so glad you liked the recipe! Now I’m dying to try other flavors too 🙂
-Jess
Is there a substitute I could use for the gelatin, I’m vegetarian and wanted some gummy snacks for my kids that weren’t $8 bucks for 3 packs of gummys
I haven’t tried substituting the gelatin, but I’m sure agar agar powder will work! I hope you and your kids like the fruit snacks! 🙂
-Jess
I know I’m late to this party – but I wanted to offer another solution to fighting with a nut milk bag or using 2 people. I make jams and jellies and lots of other canning items – a jelly strainer stand with bag (pretty much the same bag) will give you a hands free way to pour the stuff into the bag, gravity lets most of it come out on it’s own with no help from you and then you can squeeze the last bit out. The stand has a curve at the feet that lets you place it on the rim of a bowl or pot. If you search for Norpro Jelly Strainer Stand with Bag, you’ll see what I mean. I can’t wait to try try this!
Thanks so much for the help! That sounds a lot better than squeezing a silly bag for… what seems like forever haha 🙂
-Jess
Hi.. this recipe seems ideal for my 3 year old daughter, who refuses to even smell any kind of fruit, but loves all the different jelly candies.. So I have a couple of questions.. First, what about not straining the puree at all? would that change the gelatin amount? I mean, it would be better to eat the whole “body” of the fruit, wouldn’t it? And second, could I substitute the stevia with honey (I live in Greece, so honey is the best natural sweetener, not to mention that it’s really difficult to find stevia extract..)? And if yes, how much should I use, according to your experience?
Thank you in advance.. 😀
Some kids are just very picky and sometimes it’s because their taste buds just aren’t fully accustomed to certain tastes yet (I was the same exact way… I didn’t even like peanut butter or bananas, which I LOVE now). Maybe this recipe can be a good stepping stone to eating fruit!
If you skip the straining process, you’ll have a bunch of seeds in there that might get stuck in your teeth. This might be a giveaway to your daughter that there are strawberries in the fruit snacks. I agree that whole fruit is better than strained fruit, but I was trying to make a recipe that was as similar as possible to the storebought versions.
I haven’t tried honey in this recipe before, but you can give it a shot! I would recommend ~2/3 cup. However, because there is so much extra liquid being added to the recipe, you might need to increase the gelatin. I’d say add ~1 teaspoon of gelatin.
I hope you like the recipe! 😀
-Jess
Is it easy for you, the next time you make them, to measure in grams how much juice comes out of the puree and the final amount of liquid you need to have for the 40gr of gelatin? I think it’ll be easier that way for other fruits too..
Thank you..
OMG!!you have saved me from getting fat from sweets with these recipes!
Thank you soooooooo much!
You saved my life!!!!!
I wanted to know if you can use WATERMELON instead of strawberries.
I haven’t tried using watermelon in this recipe so I can’t be sure if it’ll work, but feel free to try it out! I would recommend using 2+1/4 cups Watermelon Puree and 1/4 cup Lemon Juice. Hope you like the recipe! 😀
-Jess
Hi,
Love your recipe.
How can I make these gummy bears without cooking the fruit…so I can retain the vitamin c?
If you don’t want to cook the fruit, you can add the puree after the cooking process… just note that the texture will be off since you aren’t cooking some of the water out as well.
To be honest, vitamin C is so easy to come by with other foods, you might as well just make the fruit snacks as is and just eat an orange somewhere alongside it 😉
-Jess
I have a question do you leave the gelatin setting on top for 5 min or mix it in then let it set for 5 min
You can do either or, really, but I sprinkle the gelatin evenly on top and let it sit like that for 5 minutes 😀
-Jess
How long do you think these last in the fridge? I am making these for my daughter’s teacher as a reward instead of candy so I want to know if I can make a big batch or do a batch per week.
Jordon! You are just too great. Healthy Homemade Fruit Snacks instead of horrible sugary CANDY?? Pure genius, kudos to you.
I would say these Fruit Snacks would last around 1 week or so in a tightly sealed container in the fridge. I usually finish a batch off within 4 or 5 days 😉
-Jess
Well, strawberries are not sugar free, but these snacks are an amazing idea. More than half of the carbohydrates in strawberries consist of sugars. The simple, 1 molecule kind (glucose, and fructose) and the more complex 2 molecule kind (sucrose, which is broken down into glucose and fructose). A cup of sliced strawberries contains about 11 carbohydrates. Something like 65% of those carbohydrates are in the form of those earlier mentioned sugars, and these sugars account for less than 10% of the strawberries weight. Most of the weight of a strawberry is water, but there’s also a negligible (but still present) amount of protein and fat.
The fiber content of a strawberry also helps to cut down on the snacks available carbs. The carbs that are eventually broken down to provide most of the energy for you to do the things you like to do.
Strawberries have other things going for them, but all in all, they’re a pretty safe snack option which won’t cause blood sugar to spike. So while it’s strictly not true that they’re sugar-free, they are an infinitely better choice when compared to anything of the processed nonsense variety which one could buy at the grocery store checkout line. Also, neat things like homemade gummy bears can be made of them! 🙂
-Type 1 Diabetic and food lover
Hey Matt! Yes, I know that fruits like strawberries contain natural sugars 🙂
In the baking/blogging world, “sugar-free” means free of added sugars, such as white sugar, HFCS, brown sugar, evaporated cane juice, sucanat, etc). Some bloggers say recipes with honey and maple syrup or “sugar-free” because it’s not white sugar, but on this blog, I group liquid sweeteners into the “added sugar” category.
If you’d like to lower the glycemic index of these gummy bears, you can try adding ~3 tbs of melted coconut oil to the recipe after step #6. Or, you can eat these as part of a meal with healthy fats, fiber and protein. This way your insulin won’t spike as much as it would compared to strawberries alone.
I hope this helps! It’s great to meet another food lover out there 😀
-Jess
Hi. So I can’t have gelatine. Anything Else I could use besides gelatine. If so please email me. maryyamr15@gmail.com
I really would like to use some other ingredient than gelatine.
Hi Maryyam! The only other substitute I can think of is agar agar powder, but I haven’t tried it. Hope you like the recipe! 😀
-Jess
Pingback: Clean Eating Snacks For All Ages
Pingback: Apartment Homesteading – The Healthy Apartment Homesteader
Can’t wait to make these! and I just happen to have a nut milk bag …..It was meant to be!
Have you ever tried making a big batch and freezing them? To make these weekly seems difficult for me but if I could make a large batch monthly…much more doable!
Thank you!
I haven’t tried freezing these because I’ve been too afraid to! I’m scared that after they thaw they’ll get condensation on them and “melt.” If you try this out let me know if it works!! Crossing my fingers they’re just as delicious frozen as fresh 😀
Oh my goodness – these are so cute! x
Izzy
I have a question! I made these this morning and it seems that they are just jello? I’m not sure why they are so jiggly? I strained my strawberries to just juice with no pulp. My kids are so excited I want to get this right! Help!!
I’m not sure what could’ve happened there… these should be soft like Fruit Snacks but definitely not as soft as jello. Did you make any ingredient substitutions? And did you get 2¼ cups of the strawberry mixture after straining out the pulp?
Pingback: Back To School Clean Eating Snacks | Homemade Recipes
Pingback: 15 Homemade Fruit Chew Recipes That are Great for School Lunches - DIY CHICKS
The Strawberry Gummy Bear recipe dated Feb 2017 says 3/4c lemon juice, but the Strawberry Gummy Bear recipe dated Jan 2017 says 1/4c lemon juice. I went with this recipe since it was the most current. OMG 3/4c lemon juice is way too much, unless your going for the sour patch gummy effect! Is there maybe a misprint on this recipe? I used 5 packets of Knox Unflavored Gelatin (36g, close to 1/4c) and the consistency was just right.
Are these sugar free?
Apart from the naturally occurring sugars in strawberries, yes, these are sugar free (in that there is no sugar or honey or syrup added) 🙂
Mine also turned a hello consistency. I added 3/4 c lemon juice and they were a little sour too. Still taste good. I only got about 2 c of the strawberry juice so I tried to use less geletin… can you think of what might’ve gone wrong??
That should say *jello not “hello”
If you use less gelatin, then it’s going to be like jello and not a gummy. If you don’t like the amount of lemon juice, you can use less and replace it with strawberry purée! 🙂
Hi do you know carb count on these and have you made veggie ones
I didn’t calculate the nutrition facts for this recipe but the only carbs come from the strawberries and lemon juice, not added sugar or syrup.
I have made veggie ones! I made these Green Apple Gummy Bears (using spinach) and these Orange Gummy Bears (using carrots) 🙂
Oh my word. These were so easy to make but they gelled almost instantly as I transferred them to the molds!! I had to keep the heat on and constantly stir and remelt and the whole process was super hard. Is there something I did wrong or does anyone have any tips??
That’s strange… I’ve never had that happen before! How long did you let the mixture sit after cooking? And did you substitute/omit any ingredients?
Do you recommend using frozen fruits?
No, I’d recommend using fresh strawberries. I’m sure thawed frozen strawberries would work too though!
Pingback: Fruit Treats and Snacks..Everyone Loves Them! – Creative SCD
Pingback: 28 Best Homemade Keto Candy Recipes for Your Sweet Tooth - Sincerely Kale
Pingback: Recipe Roundup: Sugar-Free Sweets – My Diabetes Home Blog