Healthy Chocolate Fudge DIY Protein Bars (Free Printable + Video!)
Healthy Chocolate Fudge DIY Protein Bars are the perfect snack, sans the guilty aftertaste. At only 7 ingredients and $1.12 per bar, these homemade protein bars are a new staple of mine.
I used to have this bad habit of never planning ahead. Especially when it came to food. My hunger would always catch me off guard and at the worst time, so I often made bad food choices. You know what I’m talking about! When the hunger strikes, that fatty, sugary chocolate chip muffin at the checkout counter looks better and better by the second. Your eyes say, “YES YES YES,” while your body says, “NO NO NO!“
Impulse usually always won me over, and my body just said, “TSK TSK TSK.”
While I would feel satisfied for a full twenty minutes, I would soon experience a sugar crash and feel lethargic for the rest of the day. Finally, I became sick of that unhealthy feeling and started planning ahead — one of the biggest steps in my transition to healthy eating. Took me long enough! About one hundred muffins and my entire high school career later…

I always made sure I had healthy snacks on hand for when I was hungry. Since I was in school, bars were the easiest to carry around. They aren’t bulky like a sandwich, bruisable like a banana, and perishable like yogurt. I started buying those horrifically processed protein bars thinking they were healthy. If I saw “high protein” and “sugar free” on the package I would grab a few right there, not even thinking to check the nutrition labels and ingredient lists. I really regret doing so. Months later, I found out these bars were made with unhealthy fats like partially hydrogenated oils (aka, dangerous trans fats), artificial sugar alcohols (which cause bloating and gas), and over a dozen ingredients that I had never heard of.
I then turned to Clif Builders bars, PureFit Bars, Simply Bars, and Organic Food Bar. I was a girl obsessed. But, they were super expensive, some contained quite a bit of added sugar, and I went through them way too quickly.
I gave up bars for a few months straight and went through withdrawal really missed them. I hated bringing apples around with me. People were probably wondering why my purse had a strange protrusion… plus, apples aren’t filling to me. I have a fast metabolism so an apple is like air. I began getting that, “Oh no, I have no healthy food!” freakout moments again.
It was time to make protein bars myself.
I needed something that was tasty, something that would keep me full for longer than two seconds, and something that was packed with nutrients, healthy fats, fiber, and protein. When I found a protein powder I liked, I was thrilled and got started on developing a recipe.
After lots of failed attempts, I finally made a successful batch of homemade protein bars: these Chocolate Fudge DIY Protein Bars!
I decided to calculate the cost per bar since my budget is becoming more and more important to me. Here’s the cost breakdown for this recipe (screenshot from my cookbook):

^^ Wow! So much cheaper than all of the bars I’ve bought throughout the years!
.
So, what about the taste? What about the texture?
Taste? Excellent. These are not as sweet as those super processed bars I used to buy, but they are sweet enough to satisfy your cravings at any time of day!
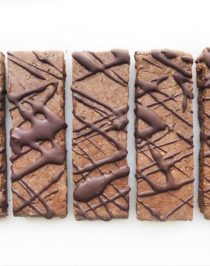
Texture? Amazing. Fudgy and almost brownie-like! Even straight out of the fridge.
.
Here’s a little showdown comparing PowerBars’ Reduced Sugar Chocolate Peanut Butter Bars with my Chocolate Fudge DIY Protein Bars:
1) Ingredients:
PowerBar®
Triscource Protein Blend (Soy Protein Isolate, Whey Protein Isolate, Calcium Caseinate), Maltitol*, Chocolate Flavored Coating (Palm Kernel Oil, Maltitol*, Cocoa, Polydextrose, Sodium Caseinate, Soy Lecithin, Monoglycerides, Natural Flavor, Sucralose*), Chicory Root Syrup, Peanut Butter, Natural Flavor, Soy Crisps (Soy Protein Isolate, Tapioca Starch, Salt), Glycerin, Peanut Flour, Water, Salt, Soy Lecithin, Sucralose.
*Artificial sweetener. Maltitol can cause bloating, gas and abdominal pain.
Desserts with Benefits
Almond Milk (Water, Almonds, Calcium Carbonate, Salt, Locust Bean Gum, Sunflower Lecithin, Gellan Gum, Natural Flavor, D-Alpha-Tocopherol, Zinc Gluconate, Vitamin A Palmitate, Riboflavin, Vitamin B12, Vitamin D2), Chocolate Brown Rice Protein Powder (Brown Rice Protein, Cocoa, Natural Flavor, Stevia, Xanthan Gum, Pectin), Almond Butter, Oats, No-Sugar-Added Chocolate Chips (Unsweetened Chocolate, Erythritol, Inulin, Cocoa Butter, Organic Soy Lecithin, Vanilla Extract, Stevia Extract), Cocoa, Vanilla Crème-Flavored Liquid Stevia Extract (Water, Organic Stevia Extract, Natural Flavors, Vanilla Extract), Salt.
2) Nutrition:
The Chocolate Fudge DIY Protein Bars have fewer calories, less saturated fat, zero cholesterol, less sodium, HALF the carbs, no added sugar, and more calcium and iron than PowerBars.

3) Price:
PowerBar® cost per bar: $2.99
DWB’s cost per bar: $1.12
.
Final Verdict? Okay, we all know that I’m a little bias in this competition, but I totally win ALL three categories! I use 100% natural ingredients, my nutrition label beats the storebought bar in nearly every aspect, and, it’s cheaper!
Win win win.

Healthy Chocolate Fudge DIY Protein Bars
Ingredients
- 128g (½ cup) Roasted Almond Butter or Natural Peanut Butter
- 1 cup 2 tbs Unsweetened Vanilla Almond Milk (or milk/nondairy milk of choice)
- 1 tsp Vanilla Crème-Flavored Stevia Extract
- 168g (1¼ cups, lightly packed) Chocolate Brown Rice Protein Powder **
- 80g (⅔ cup) Oat Flour
- 2 tbs Unsweetened Natural Cocoa Powder
- ⅛ tsp Salt
- 2 tbs No-Sugar-Added Dark Chocolate Chips or Mini Semi-Sweet Chocolate Chips
Instructions
- Line an 8x8” brownie pan with parchment paper. Set aside.
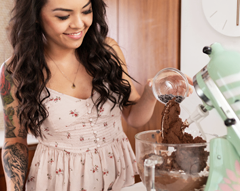
- In an electric stand mixer bowl fitted with a beater attachment, add all of the ingredients except the mini chocolate chips. Mix on low speed until everything is fully incorporated. Scrape down the sides of the bowl. Mix on medium speed for one last mix. Mixture should be thick and fudgy, like cookie dough.
- Scoop the mixture into the brownie pan and flatten it out. Sprinkle the mini chocolate chips on top and press them into the surface. Tightly cover the pan with plastic wrap and refrigerate overnight.
- Lift the mixture out of the pan. Slice into 10 bars. Individually wrap the protein bars in plastic sandwich baggies. Keeps in the refrigerator for ~1 week, or in the freezer for up to 3 months.
Recipe Notes
@cultivatewithkruti made a batch! How good do these look??

.
Here’s the recipe in a FREE, downloadable printable format for ya!

.
Watch me make these no-bake Chocolate Fudge DIY Protein Bars on camera:
Enjoy!
.
Be happy.
Live fully.
Eat protein bars.
.
– Jess
.
PS: If you like this recipe, then you’ll LOVE my DIY Protein Bars Cookbook! With 48 protein bar recipes, you’ll never buy protein bars from the store again. To learn more about the book and see some sneak peeks, see this page!

.

.
Indulge − no strings attached!