Healthy Graham Cracker Fudge
Healthy Graham Cracker Fudge has invaded my cookie jar dorm room!
They have also invaded my fridge, but I welcome such invasions 😉


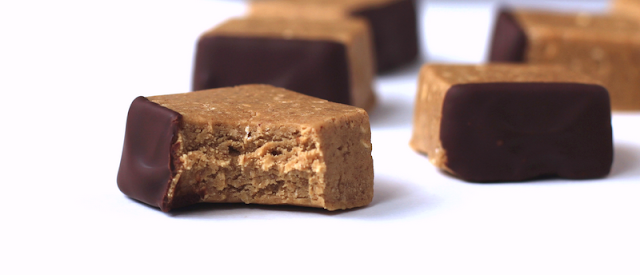
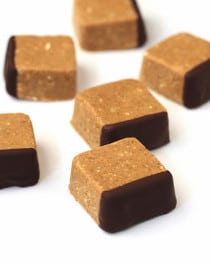
These Graham Cracker Fudge Bites fit the bill. I pressed the dough into a nonstick mini brownie mold and was awarded with twenty-eight cute baby bites for sweet snacking! I crossed my fingers and hoped that they would last for more than two days.
They kind of look like square Buckeye Balls, but I swear, these are graham crackery, not peanut buttery. I didn’t get the hit of cinnamon that I was looking for so next time I’ll add an additional ¼ tsp. Other than that, these adorable fudge cubes are perfect, they are simple and they are delicious. And the fact that they are nutritionally balanced (have fats, carbs, fiber and protein), unlike regular graham crackers, makes me more than glad to eat them…
Which I did, four cubes one cube at a time… yeah, they didn’t last as long as I’d hoped…
Healthy Graham Cracker Fudge
Ingredients
- 192g (2 cups) Old Fashioned Rolled Oats
- 48g (¼ cup) Sucanat (or dry sweetener of choice)
- 124g (4 scoops) Vanilla Whey Protein Powder
- 1 tsp Ground Cinnamon
- ¼ tsp Salt
- 112g (½ cup) Raw Coconut Butter
- 294g (¾ cup + 2 tbs ) Honey
- 28g (1 tbs + 1 tsp) Molasses
- 1 tsp Vanilla Extract
- 10 drops Liquid Stevia Extract
- 1 oz 70% Cacao Chocolate (or 4oz if you want to coat the cubes entirely)
Instructions
- In a large blender, blend the oats and sucanat until flour-like and pour into a large mixing bowl. Whisk in the protein powder, cinnamon and salt.
- Microwave the coconut butter, honey and molasses in a microwave-safe bowl at 15 second intervals, stirring between each one, until the coconut butter is melted. Add the extracts and stir.
- Pour the microwave mixture over the dry ingredients and stir together until mixture is even (I used a rubber spatula, but you can definitely get in there with your hands).
- Press the mixture into a brownie mold with 1 inch molds, or line a standard brownie pan with parchment paper and flatten the mixture into it. Freeze for 30 minutes.
- Microwave the chocolate in a microwave-safe bowl at 30-second intervals, stirring between each one until chocolate is melted, let cool slightly.
- Take your beloved fudge bites out of the freezer and pop each one out of the mold onto some parchment paper taped to a cookie sheet or large, flat plate. If using the standard brownie pan, slice the fudge into little squares with a sharp knife.
- Dip each square into chocolate and place on the parchment paper. Return the bites to the fridge (or freezer if you want the express route) until chocolate is completely hardened.


I love your recipes! They sometimes remind me of molecular gastronomy 🙂 And I’d love to try stevia extract.
wonderglue@hotmail.com
This website is a gem, I am so happy I found it today! I am going to give these, and about a dozen other recipes on this site, a try this month! Thanks for sharing your creativity and passion with us!
i love stevia!
alyssa.benner@gmail.com
Wow! These look so great. Can’t wait to try it!
I’ve been craving chocolate dipped digestive biscuits from England (choco covered graham crackers)for so long and these look soo good and quite healthy which is always a plus. Never knew they had liquid stevia extract…cool! Thanks for your yummy posts!
~Sharon (shay1111@aol.com)
looks delicious. have you thought about adding dried fruit or nuts? kinda makes it more like trail mix though.
I’m gonna have to try that Chocolate (Smores Wannabe) Pie. Sounds so good! And we love chocolate pie in this house!
abigail.lee {At} gmail.com
These look delicious!
I love baking so winning the stevia extract would be great! Thank you for the opportunity!
i love your recipes! THey are healthy but amazing tasting!
I would love to try baking with Stevia. I’m a dietitian and I love to experiment with recipes to make them healthier!
Thank you for sharing your healthy and scrumptious recipes! I just came across your blog the other day and I was in heaven 🙂 I can’t wait to make the mint chocolate crispy treats. I have a HUGE sweet tooth, but I find it hard to satisfy since there are usually an unhealthy amount of fat, sugar, etc. in most recipes. I’m also in college and very inspired by nutrition so I am(try to be) aware of what I put in my body these days!
I wish you lots of luck on your future recipes,
alex_valenzuela28 @ yahoo.com
this fudge looks dangerously good – and surprisingly, not particularly unhealthy
Just stumbled upon your blog and loving the recipes. I’ve never tried that kind of liquid stevia before!
These look so good! I can’t wait to try these!
Also love your blog!
OMG… these are sooooooo delicious! I didn’t use Stevia because I didn’t have any, and they were plenty sweet enough. I also used the agave because I wanted to make them vegan for some friends at work. Maybe it was the molds I used (cute ones from Ikea), but this mixture was particularly sticky and hard to remove (even after freezing). Is there a trick you can share with me? Maybe a shot of non-stick cooking spray or a coat of coconut oil?
I’m glad this worked without the stevia! But that’s strange about it being sticky, every time I made this it had a cookie dough/fudge texture. Are you sure you used coconut butter rather than coconut oil? It could have been the agave, since some brands are very liquidy while honey is syrupy and somewhat thick. I didn’t spray the mold, I just popped them out. This is the mold I used:
http://www.amazon.com/Wilton-2105-4923-24-Cavity-Silicone-Brownie-Squares/dp/B001T4URXG/ref=sr_1_1?ie=UTF8&qid=1340676319&sr=8-1&keywords=silicone+brownie+mold
I’ll try this soon using agave instead of honey, if it’s too sticky maybe I’ll add some more protein powder or oat flour. Thanks for letting me know 🙂
Pingback: Desserts With Benefits» Blog Archive
Pingback: Desserts With Benefits
Pingback: Desserts With Benefits